How to print envelopes in Google Docs?
This guide explains you how to create and print envelopes in Google Docs, using the Smart Label Maker add-on. You can also find several other tutorials on how to use Google Docs to create and print labels using the same tool.
Here is a summary of this step-by-step guide:
- Open a new document
- Open Smart Label Maker
- Select an envelope size
- Edit document
- Add merge fields(optional)
- Open the new document
- Preview before printing
- Print envelopes
1. Open a blank document
Create a new Google Docs document and leave it blank. This document will be used to create and print your envelopes.
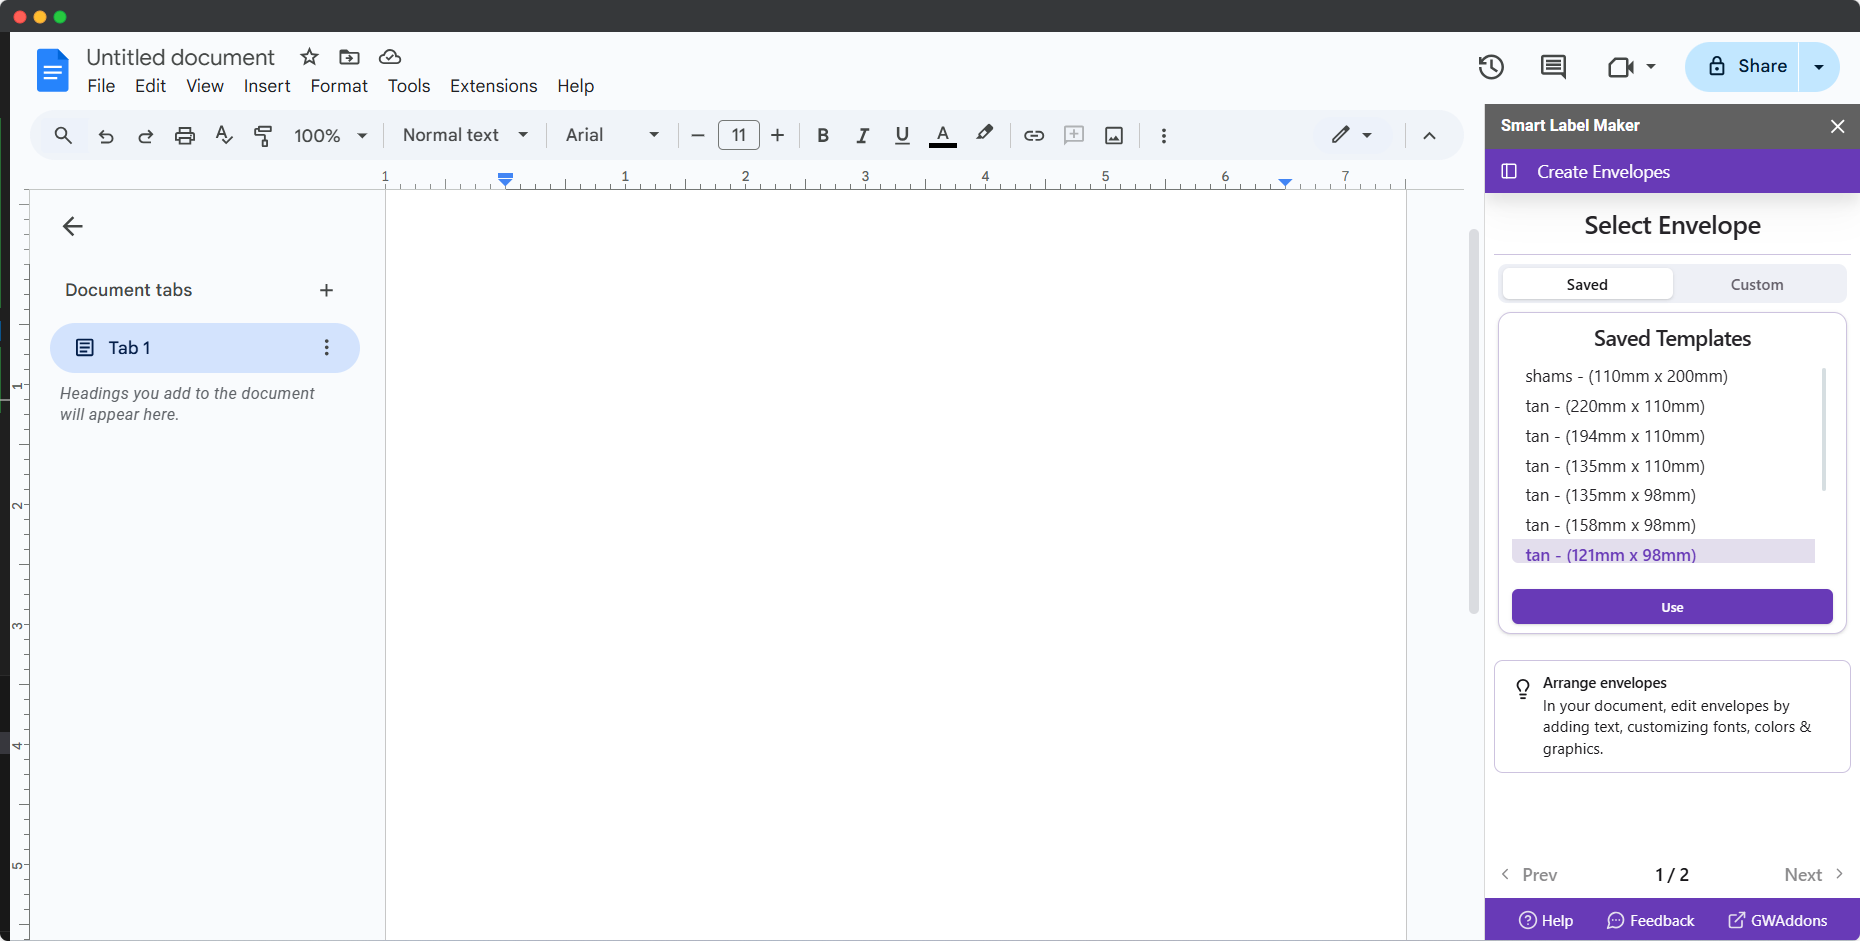
2. Open Smart Label Maker
In Google Docs, launch the Smart Label Maker from the sidebar, then select “Envelopes”. If you don’t have the add-on yet, make sure to install it first. After the installation, reload the document by closing it and reopening it.
Note: you might need to refresh your document page the first time to load the sidebar correctly.

3. Select an envelope size
Within the sidebar, click on “Select a tempalate” > “Most popular templates” > “Envelopes”, then look at the available range of sizes in the list. Over 35+ sizes are available. Note that DL envelopes are the most widely used, as well as Size 10 envelopes which are slightly larger. Once you have selected your envelope size, click on “Apply”.
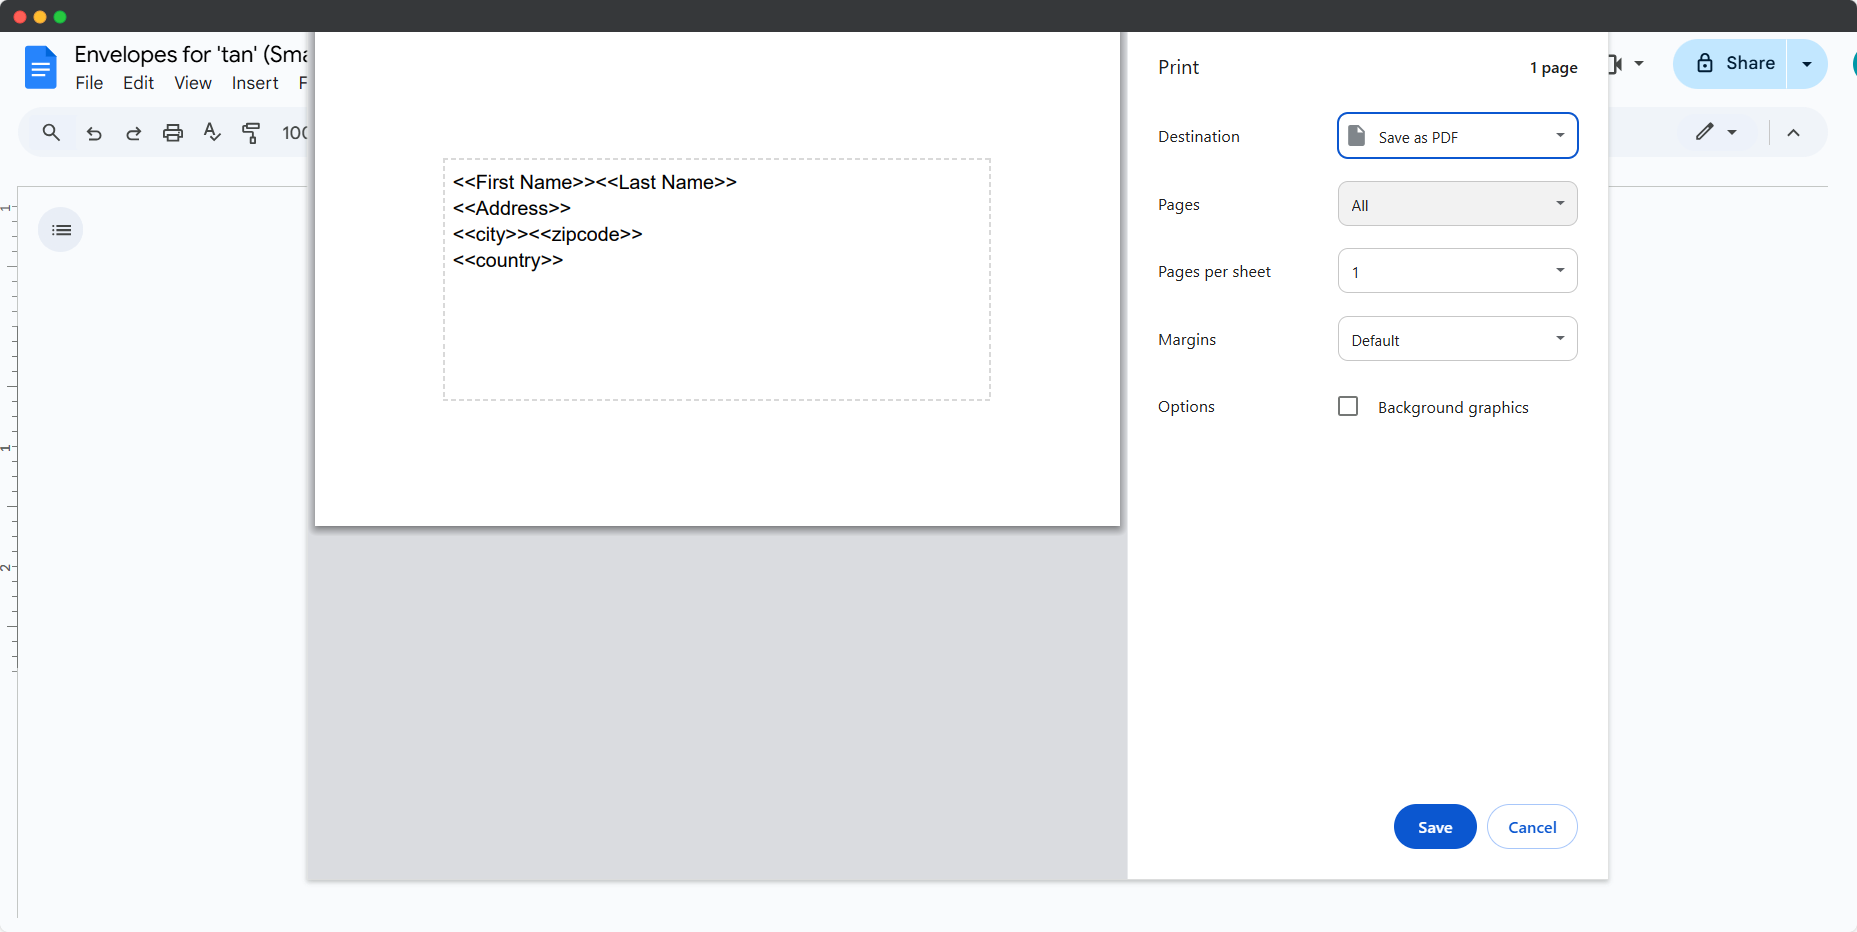
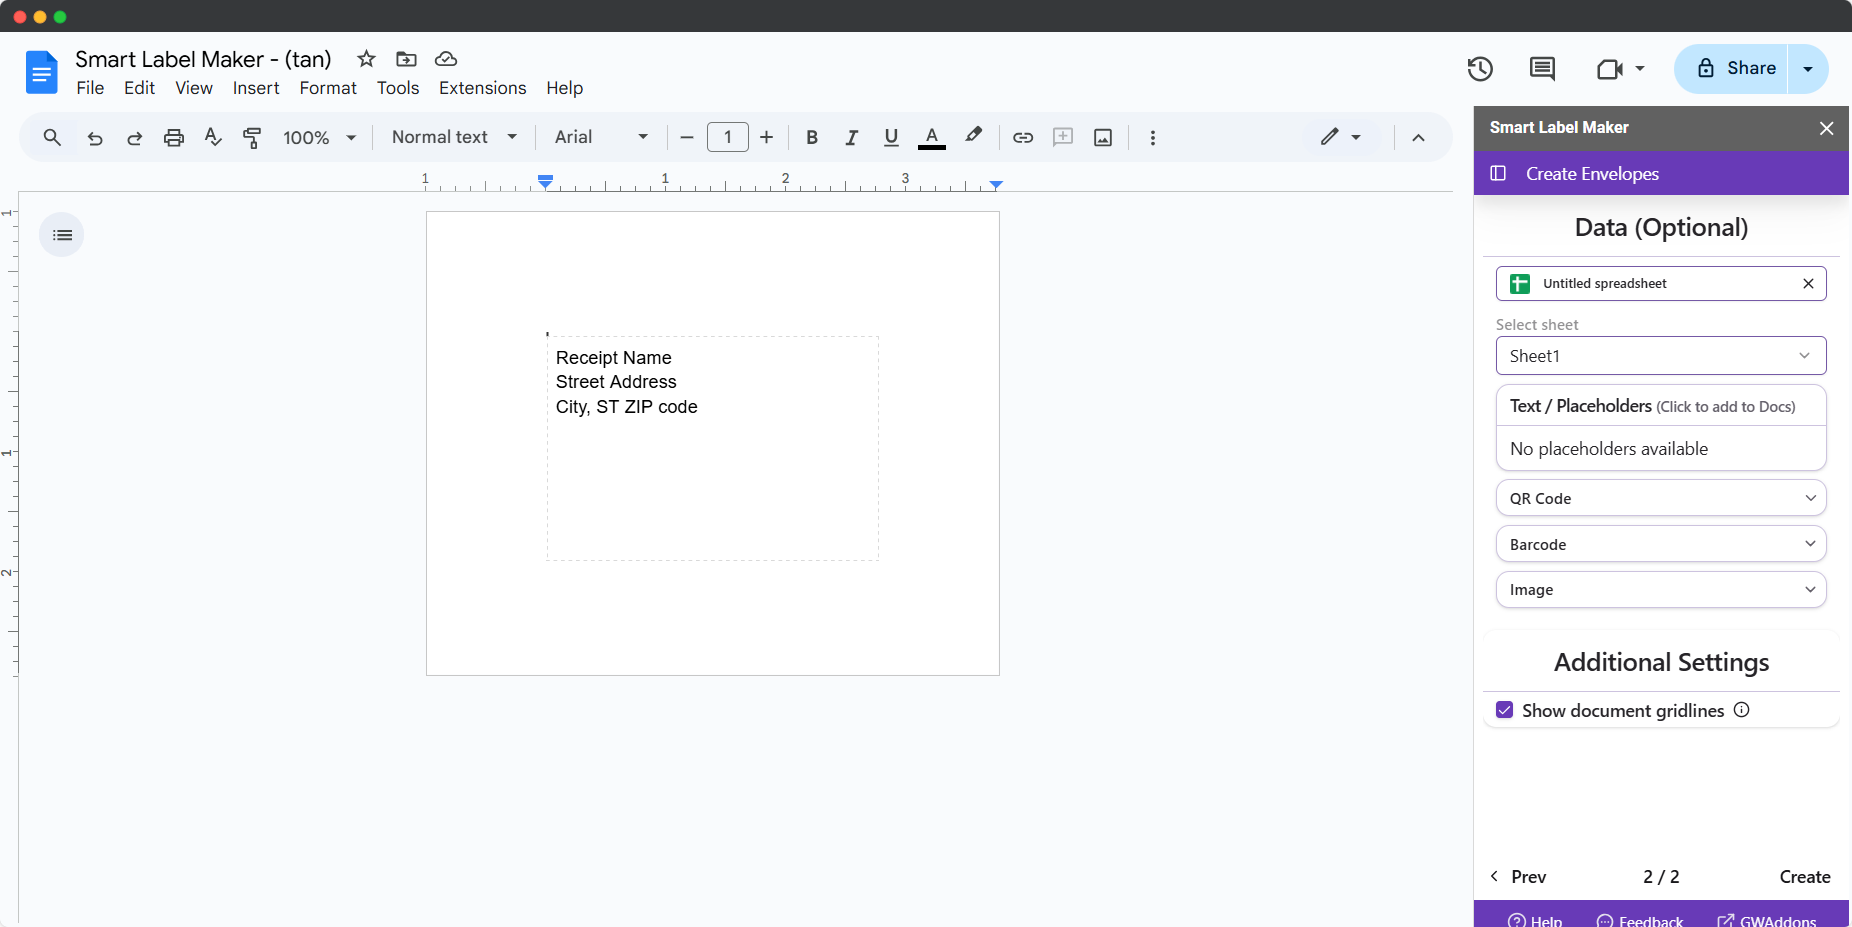
4. Edit document
Edit the first page of the document with your desired envelope formatting. In our example, we’ve added the delivery address in the dedicated area of the envelope. You can customize the font, colors or text alignement using the formatting options offered by Google Docs.
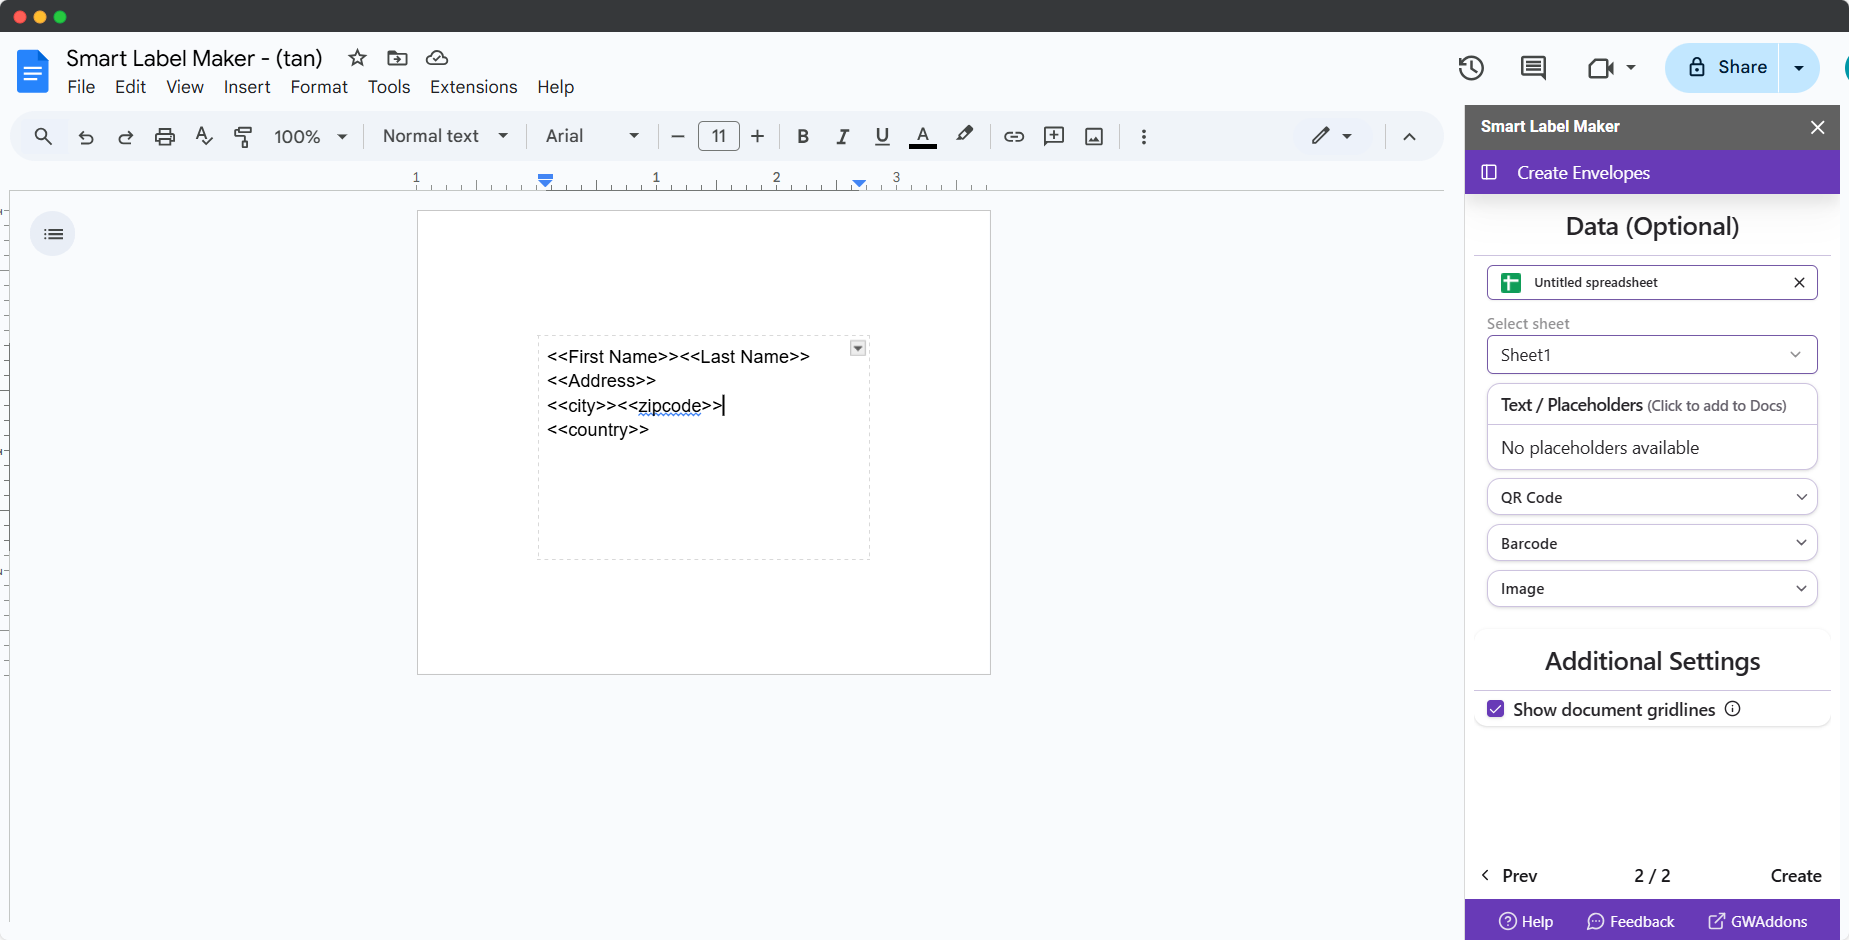
5. Add merge fields (optional)
If you want to print envelopes for a mailing list from a Google Sheets spreadsheet, click on “Select a spreadsheet” to link your mailing list. Then, you can add merge fields clicking on “insert a merge field”, then selecting the fields you want to merge. Merge fields are useful to insert a personalized recipient name or address for example.
Here is guide that will help you make a mailing list in Google Sheets.
Once you are done, click on “Create envelopes”. Your envelopes will be generated automatically and the merge fields will be replaced by the values from your spreadsheet.
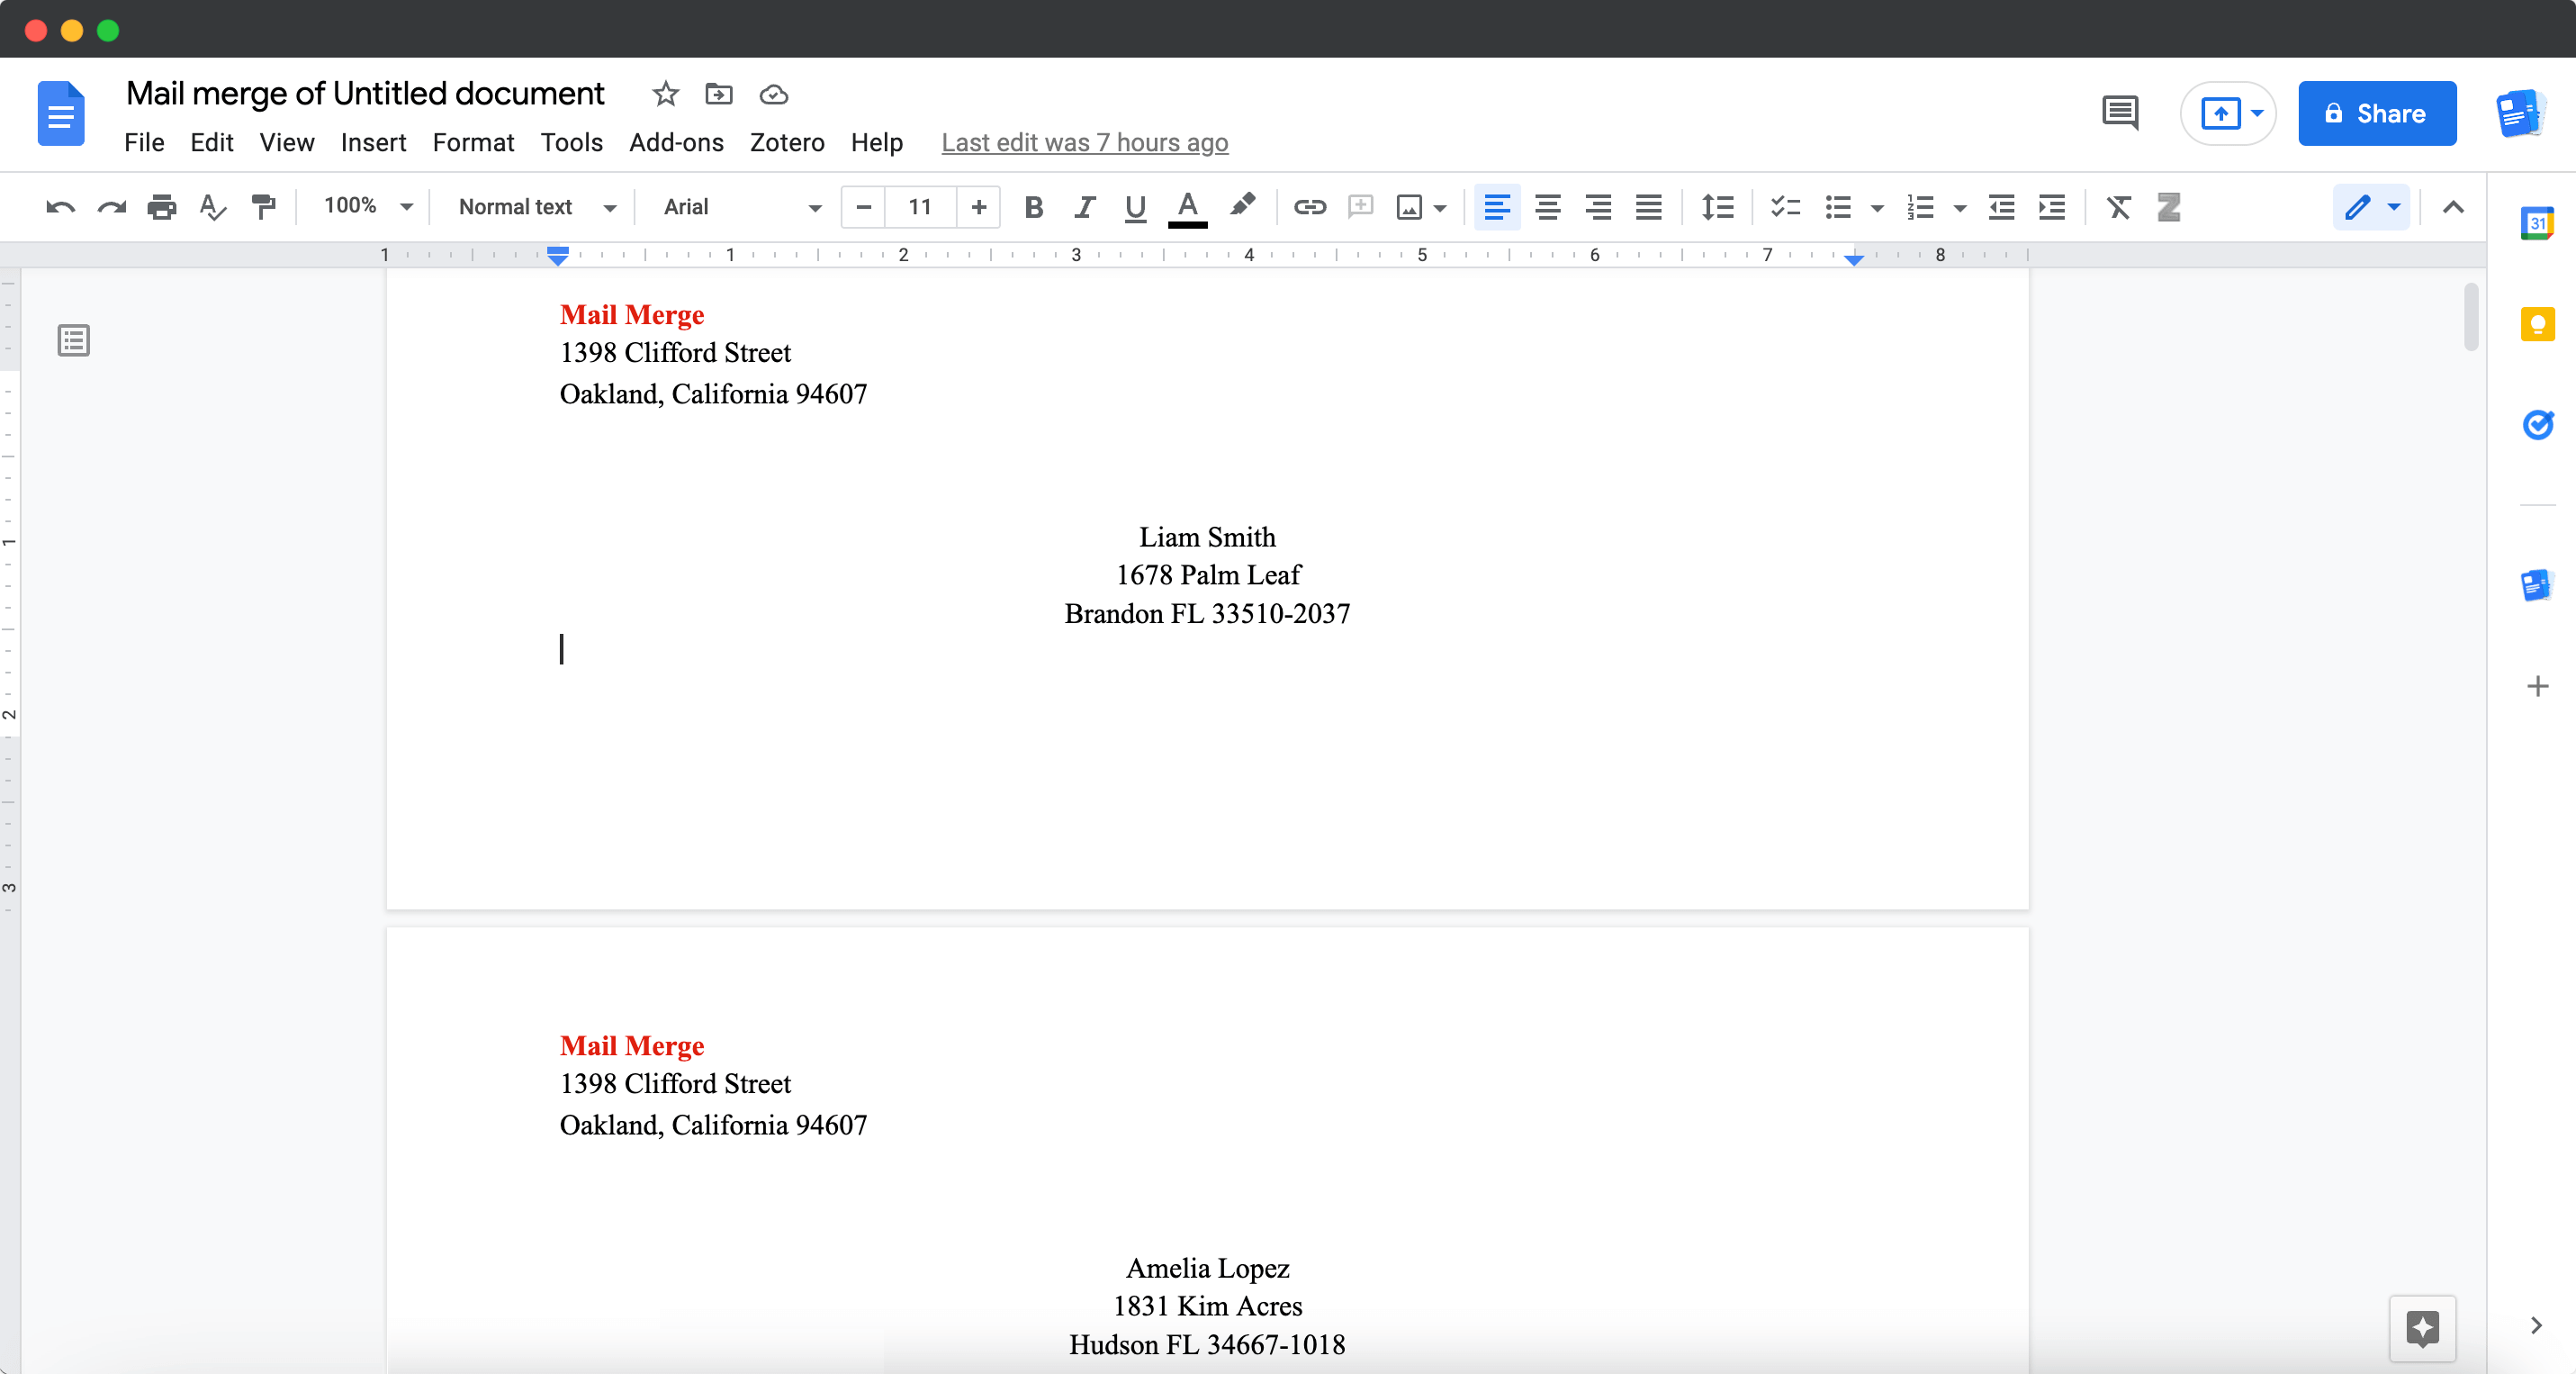
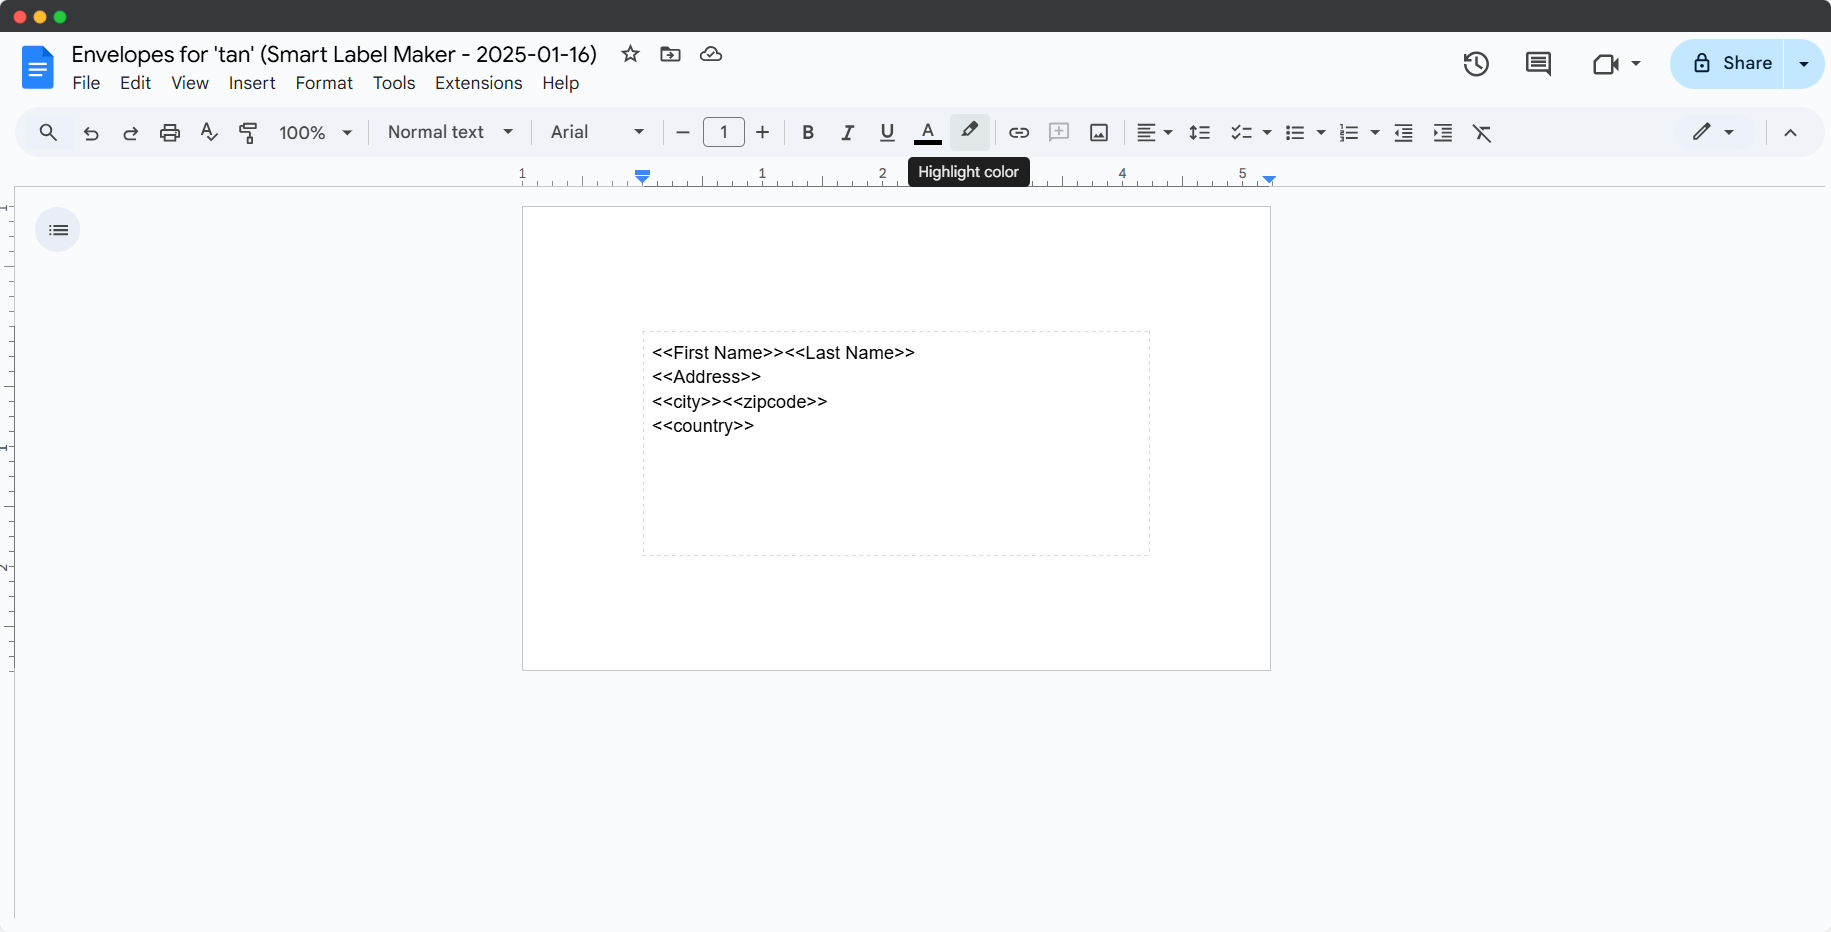
6. Open the new document
Click on “Open” to access your newly created envelopes document.
.png)
7. Preview before printing
Check that your envelopes look as expected. If you need to make any changes, edit the envelopes directly in the new document or go back to the previous document to apply changes on all envelopes.
8. Print envelopes
Now that your document is ready and your envelopes look right, click on “File” > “Print”. In the print dialog, make sure to set the paper size to the adapted envelope format.